> Jensen Healey & Jensen GT Tech > Electrical & Instruments > Speedo not working, but Odometer working? |
> Jensen Healey & Jensen GT Tech > Electrical & Instruments > Speedo not working, but Odometer working? |
| Moderated by: Greg Fletcher | ||
| Author | Post | |||||||||
|---|---|---|---|---|---|---|---|---|---|---|
|
discogodfather Member
|
I recently pulled the cable on my 73 with a getrag 235/5speed. Everything was working fine. I pulled the cable apart and lubed it and then reinstalled. Put some heat sheething around some areas where it was touching the exhaust. The getrag 5 speed cable simply enters the housing on the side and has a bolt that runs 90 degrees to the cable end and cinches in down. Seems like all connections are 100% The odometer works but the speed doesn't. I took the gauge out again, pulled the metal housing, and looked at the internals. Everything looks good, no dirt, cleaned it anyway. If I agitated the speed by hand, meaning turning the input shaft, the speedo needle seems to tick a bit. The little plastic gears all look good. This is the Smiths gauge, nothing aftermarket. Can I assume the cable connected to the tranny is good and spinning because the odo is working, and that the problem is somehow in the gauge? |
|||||||||
|
redracer Member
|
You are correct; the very early speedos had spinning metal-on-metal, and would seize & break the cable. Many dealers would install a new cable and have that one break immediately. The later speedos used nylon/plastic for the rotating sleeve, so if yours is truly from a '73, be sure it has the plastic rotating part. (have plenty of very good used ones if you want) Years ago, I used a nail that I squared off one end to "match" the speedo cable to "test" them before installing a new cable. Interestingly, this past Septemkber driving back from the National at St. Louis, my ODOMETER stopped working, but the speedometer kept going. I plan to do a write up on what I discovered (Mike & Peter at Nissonger were useless). If you have your apart, notice the wrote plastic piece that gets driven directly off the cog where the cable comes in. It turns another cog(located at 6 o'clock) and the only thing keeping that piece up is a little lube and the small flat spring steel keeping it in place. If this white plastic "drops" down(from gravity) your odometer will not work! You may notice a "tab" on this white plastic that looks as though it would be made to "rest" on something so the piece couldn't "drop" down?? Check it out---too much to do for a photo write up now |
|||||||||
|
Rick in Miami Member
|
There is a great write up on Smith's & Jaeger Speedometer repair here. http://lotus-europa.com/manuals/misc/electrical/Smith-jaeger_speedo_repair.pdf (edited link) Last edited on 06-29-2020 01:49 pm by Rick in Miami |
|||||||||
|
redracer Member
|
well--maybe it worked awhile ago, but this pops up: This site can’t be reachedobshttp’s server IP address could not be found. Try running Windows Network Diagnostics. DNS_PROBE_FINISHED_NXDOMAIN |
|||||||||
|
Esprit2 Member
|
Try this one: https://drive.google.com/file/d/1G2Y_-RrRdAFafia3T5yO-q0AedSrH0or/view Regards, Tim Engel |
|||||||||
|
Rick in Miami Member
|
Thanks Tim. That'll do it. I edited my previous link. Last edited on 06-29-2020 01:50 pm by Rick in Miami |
|||||||||
|
discogodfather Member
|
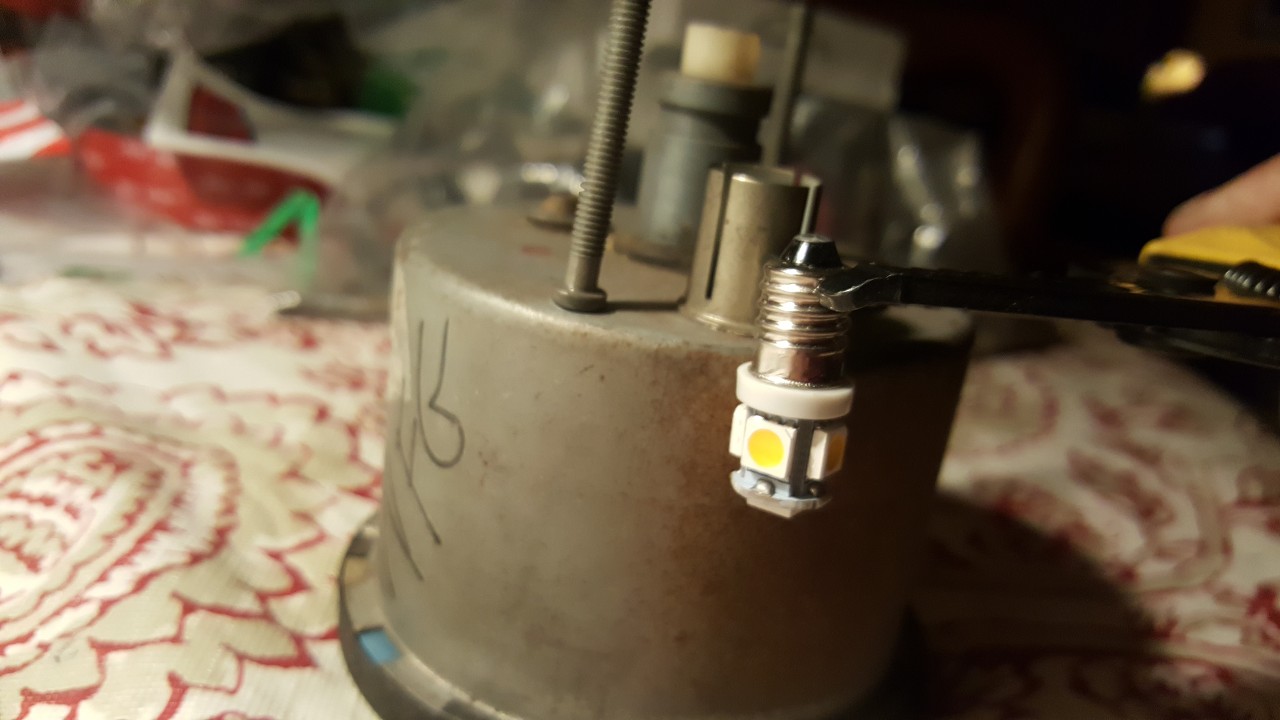
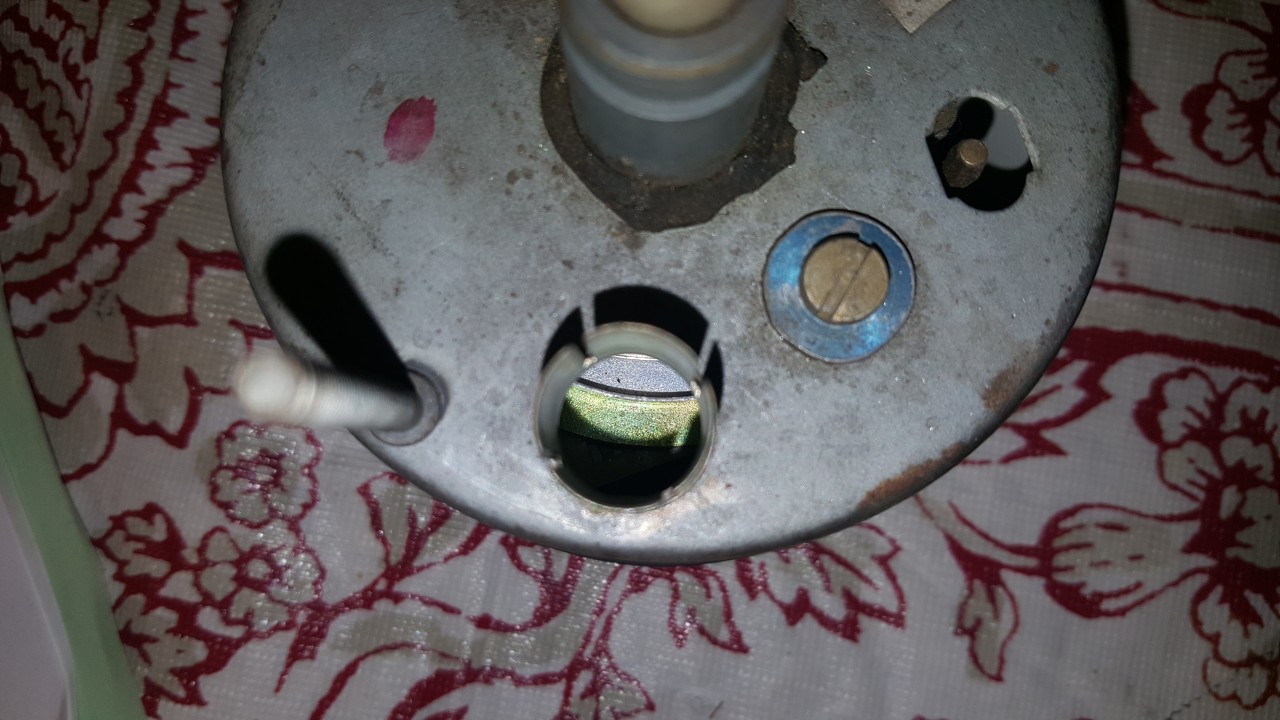
I took everything apart and took the gauge out of it's metal housing. Used the manual provided to check everything out, it is a great guide. I used a drill with a drillbit with a bit of tape on the back of it to simulate the gauge turning. BTW, it turns counter clockwise for those wondering. I have the later plastic gears. Everything rotated smoothly and the needle picked up with speed, odo working well too. I turned my attention to the cable. The guide states that pulling the actual cable out of the sheething, even when it's still installed on the transmission side. Basically you just pull it out, then you can rotate it freely making sure it dosen't bind. As you push the cable back in, it will rotate freely until about the last inch of travel. It's important to rotate it slightly as you push it back in, you can feel it stop slightly as it enters the square socket drive in the transmission. As long as it pushes all the way in, dosen't bind, and seats firmly you are good. If it rotates when its fully in then the transmission socket is not engaging the cable or the cable might be broken. Mine seated well and after you seat it, the cable will no longer rotate. So I was a bit confused. Put everything back in and it still didn't work, but the odo did, just like before. I wondered if somehow the needle mechanism, which is a simply spring, magnet, and shaft setup was binding in some way. I took it out and everything seemed to turn smoothly. I installed the metal housing and also did the drill test, it worked fine. Again I was at a loss, so I tried thinking about what was different from the bench to the dashboard in terms of the conditions of the gauge. Then it hit me- I was staring at the light bulb I had recently installed. The original is of course a little glass bulb, but I had replaced it with an LED unit. The LED was very long. So when I had pushed it all the way in, it was dragging on the back of the magnet wheel inside, arresting it. So I simply didn't push it all the way in, and let it have plenty of clearance. Now everything work great. |
|||||||||
|
redracer Member
|
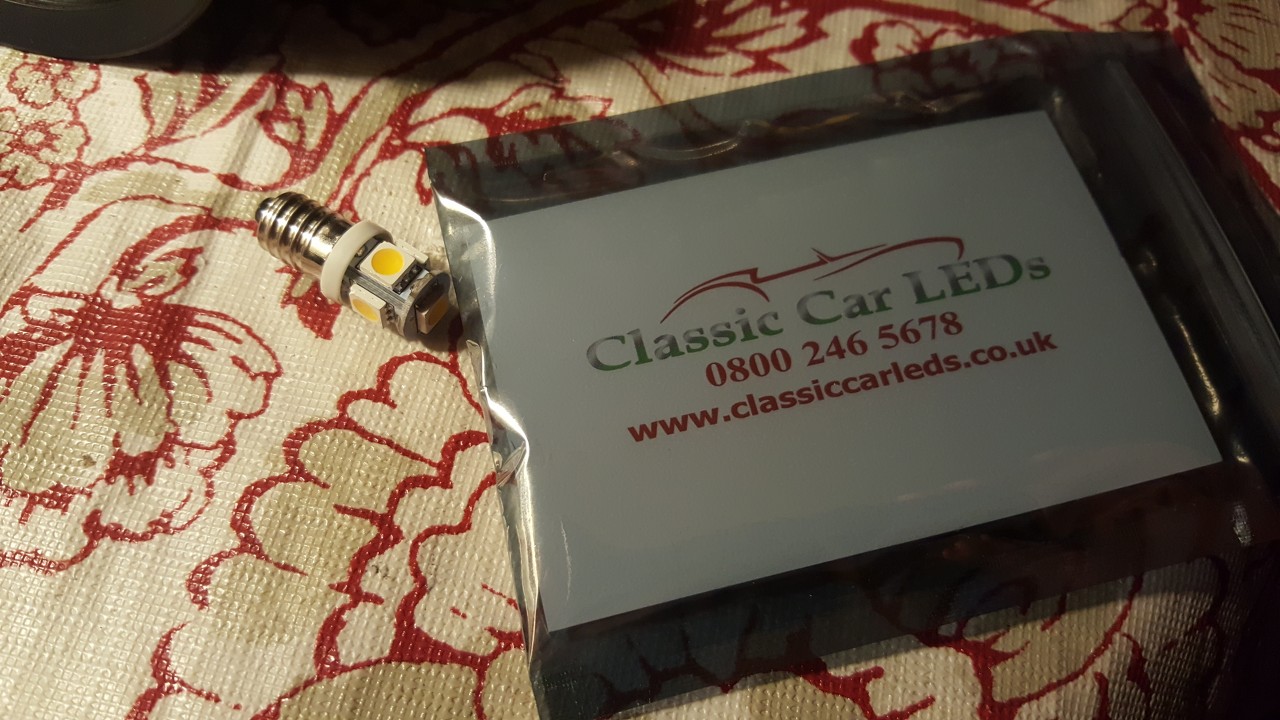
Very curious as to where you got your LED for the instruments? I got mine from ClassicCarLEDs.co.uk earlier this year; they were (then) the only ones to have the screw in LED bulbs. I am testing both the 40 lumen and 100 lumen(the 10 lumens are way too weak). I have not had a problem with their length hitting the speed magnet? bruce |
|||||||||
|
discogodfather Member
|
redracer wrote:Very curious as to where you got your LED for the instruments? I got mine from ClassicCarLEDs.co.uk That's interesting Bruce I think I did get them from that source about 6 months ago on ebay. It was from the UK. They have a blocky design with exposed circuit boards, and they are squarish at the end. They probably are around 5-7mm longer than a stock bulb. I also busted one screwing it in. I think I have a spare and can post a pic, let me see if I can find it. Maybe I am going about this wrong, I pulled the bulb out a bit and am assuming this was the cause of the problem. Maybe some of the work I did gently seating the actual cable made the difference, or the care I took to position the cable. I also have a spare speedo lying around somewhere, I can confirm what length the bulb needs to be to now interfere with the rotating bits. |
|||||||||
|
redracer Member
|
Disco--many thanks: Just went out and checked the 40 and 100 lumen LEDs from ClassicCarLEDs(U.K.) and yes, the 100 lumen ones are much longer than the 40 lumens ones(and they have PLENTY of light compared to the old tungsten filament ones) and YES--the 100 lumen ones do hit the large "rotor" in the speedo gauge. Either pulling it out a little(as you did) or using the "flathead" 40 lumen ones will fix that. btw, the rheostat will not work with them so I ordered and modified one from Amazon ((https://www.amazon.com/gp/product/B01C4UBLZG/ref=ppx_yo_dt_b_search_asin_title?ie=UTF8&psc=1 12 Volt DC Dimmer for LED, Halogen, Incandescent - RV, Auto, Truck, Marine, and Strip Lighting - Long Shaft - Silver)) The long shaft is necessary; and small tube of heat shrink will allow the original knob(PANEL) to be put on along with some VHB tape on the back--your design. |
|||||||||
|
discogodfather Member
|
Yes, the rehostat is now an on and off button basically. I changed all the bulbs on the dash to LED's only to find this out, I will try that amazon unit. Here are some picks of what you described, I knew it. The tip of the led just rams into the rotor. Glad I figured this out because I am sure it wasn't good for the mechanism being frozen in place at high rpm's of the cable.      Last edited on 07-04-2020 05:22 am by discogodfather |
|||||||||